Web Transactions allow you to generate leads online by automatically collecting data from your website or incoming emails and creating relevant entries in your CRM system. This feature enables you to easily capture inquiries, create new accounts, and allocate tasks, all while ensuring compliance with international data protection legislation, such as GDPR. In this article, you will learn how to set up and use Web Transactions effectively within Spotler CRM.
On this page you have the following options:
When to use Web Transactions
Web Transactions can be used to automatically capture and process leads generated via web forms or incoming emails.
They are particularly useful when you want to:
- Capture inquiries from your website or emails
- Create new accounts or update existing ones
- Track activities and tasks related to new inquiries
- Integrate leads into automated marketing campaigns
- Create support cases if using the Service & Support tool
- Record marketing consent
Add Web Transaction
To set up a Web Transaction, follow these steps:
- Go to Settings Integrations and open the Web Transactions tab.
- Click the Add button to open the Web Transactions form. If you want to edit a already created Web Transaction, click on the name of that specific Web Transaction.
- Complete the form with the relevant parameters for your Web Transaction, such as creating an Account, assigning a Task, or adding to a Campaign.
- Click Save to create the Web Transaction.
Example: Query String for Web Transaction
You can use a simple URL with an image file <img> to trigger the Web Transaction. Here is an example of a query string:
src=’http://webtrans.spotlercrm.com/webtrans.gif?c=1024&t=enquiry&email=mike@xyzconsultants.com&name=Mike%20Peterson&
organisation=XYZ%20Consultants’
In this example:
-
1024is the number of your CRM system -
enquiryis the name of the Web Transaction - The remaining fields are the form data captured and passed to the CRM
Collecting Consents with Web Transactions
Web Transactions can also be used to collect consent from contacts for your Mailing & Consent Lists. Here's how you can set it up:
- Map a checkbox from your web form to the consent field for your Mailing & Consent List in the Web Transaction settings.
- For example, map Consent.Newsletter to Form.Subscribe if you're capturing newsletter subscription consent.
- Add a description to the Consent Text field (e.g., “Newsletter Signup”).
- If the checkbox is ticked, the Web Transaction will add the contact to the specified Mailing & Consent List along with the consent description and timestamp.
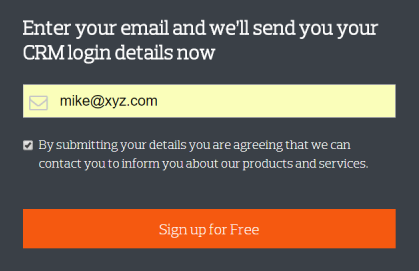
Important
Ensure your web form includes the necessary consent checkboxes to comply with international data protection laws, including GDPR.
To comply with GDPR, you will need to record “explicit consent” which means you cannot use a pre-ticked checkbox. It has to be an unticked box with an explanation of what will happen if you do tick the checkbox. For example: