This article is only applicable to users with access to the full Marketing module of Spotler CRM
The actions described in this article can only be performed if you have other marketing systems connected to your CRM. If you do not have access to this module, the steps in this article may not be relevant for you.
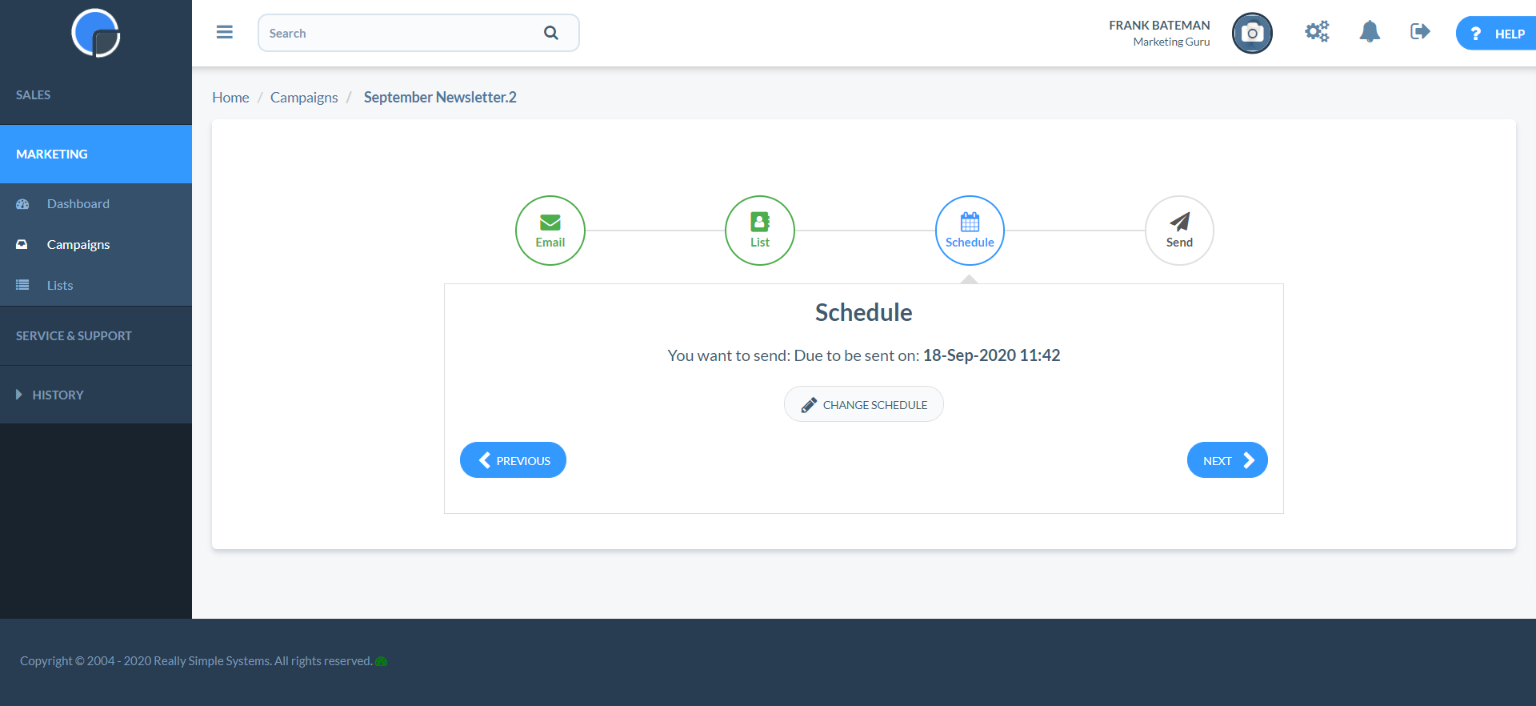
To schedule and send emails, go to the Campaign Wizard by creating a new Campaign under Marketing Campaigns.
Schedule email
Using the Campaign Wizard, in the Schedule page, select the “Schedule for later” option. This will bring up a date picker where you can select the date and time to send your message. Alternatively, you can select to “Send as soon as possible.” We recommend scheduling your email so you have time to intervene or cancel in case of a mistake.
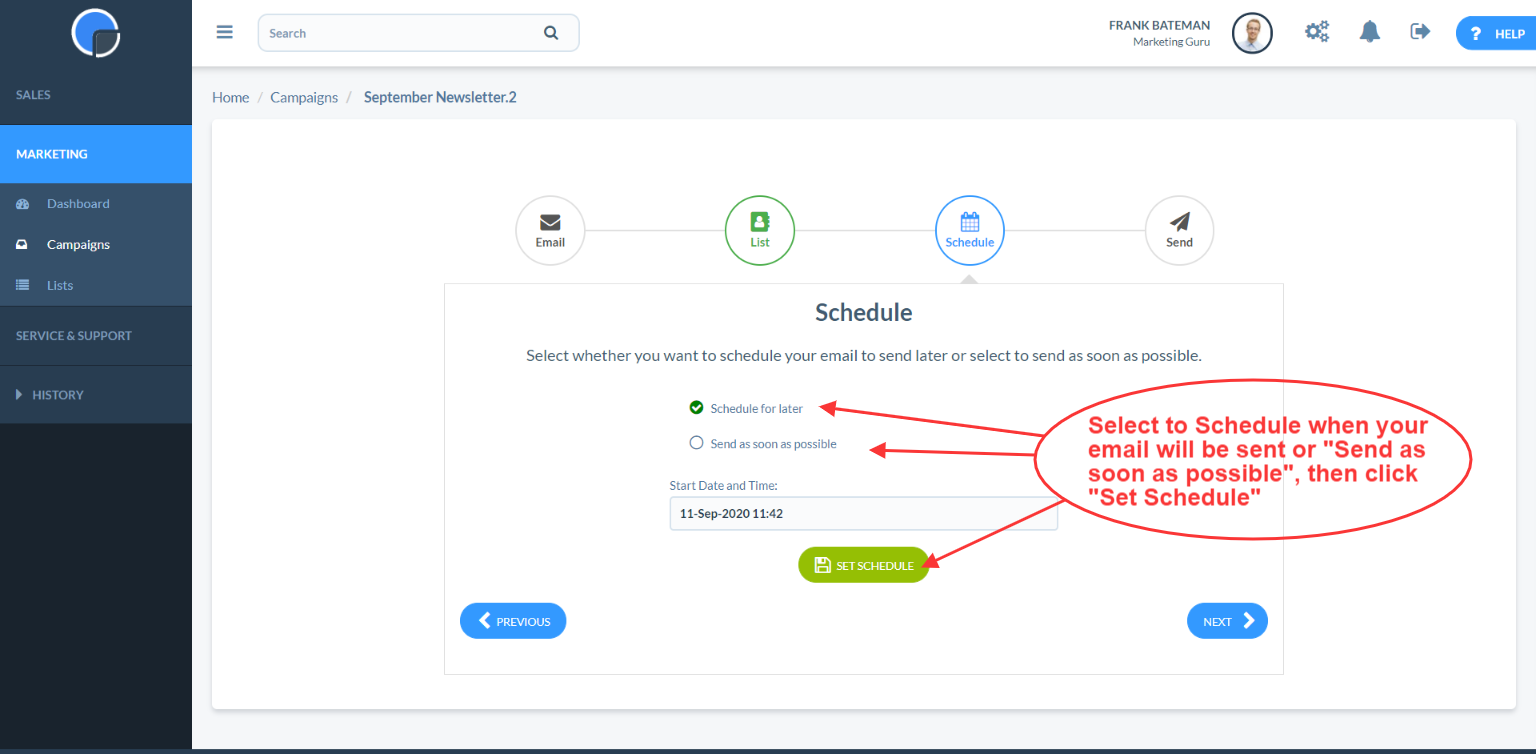
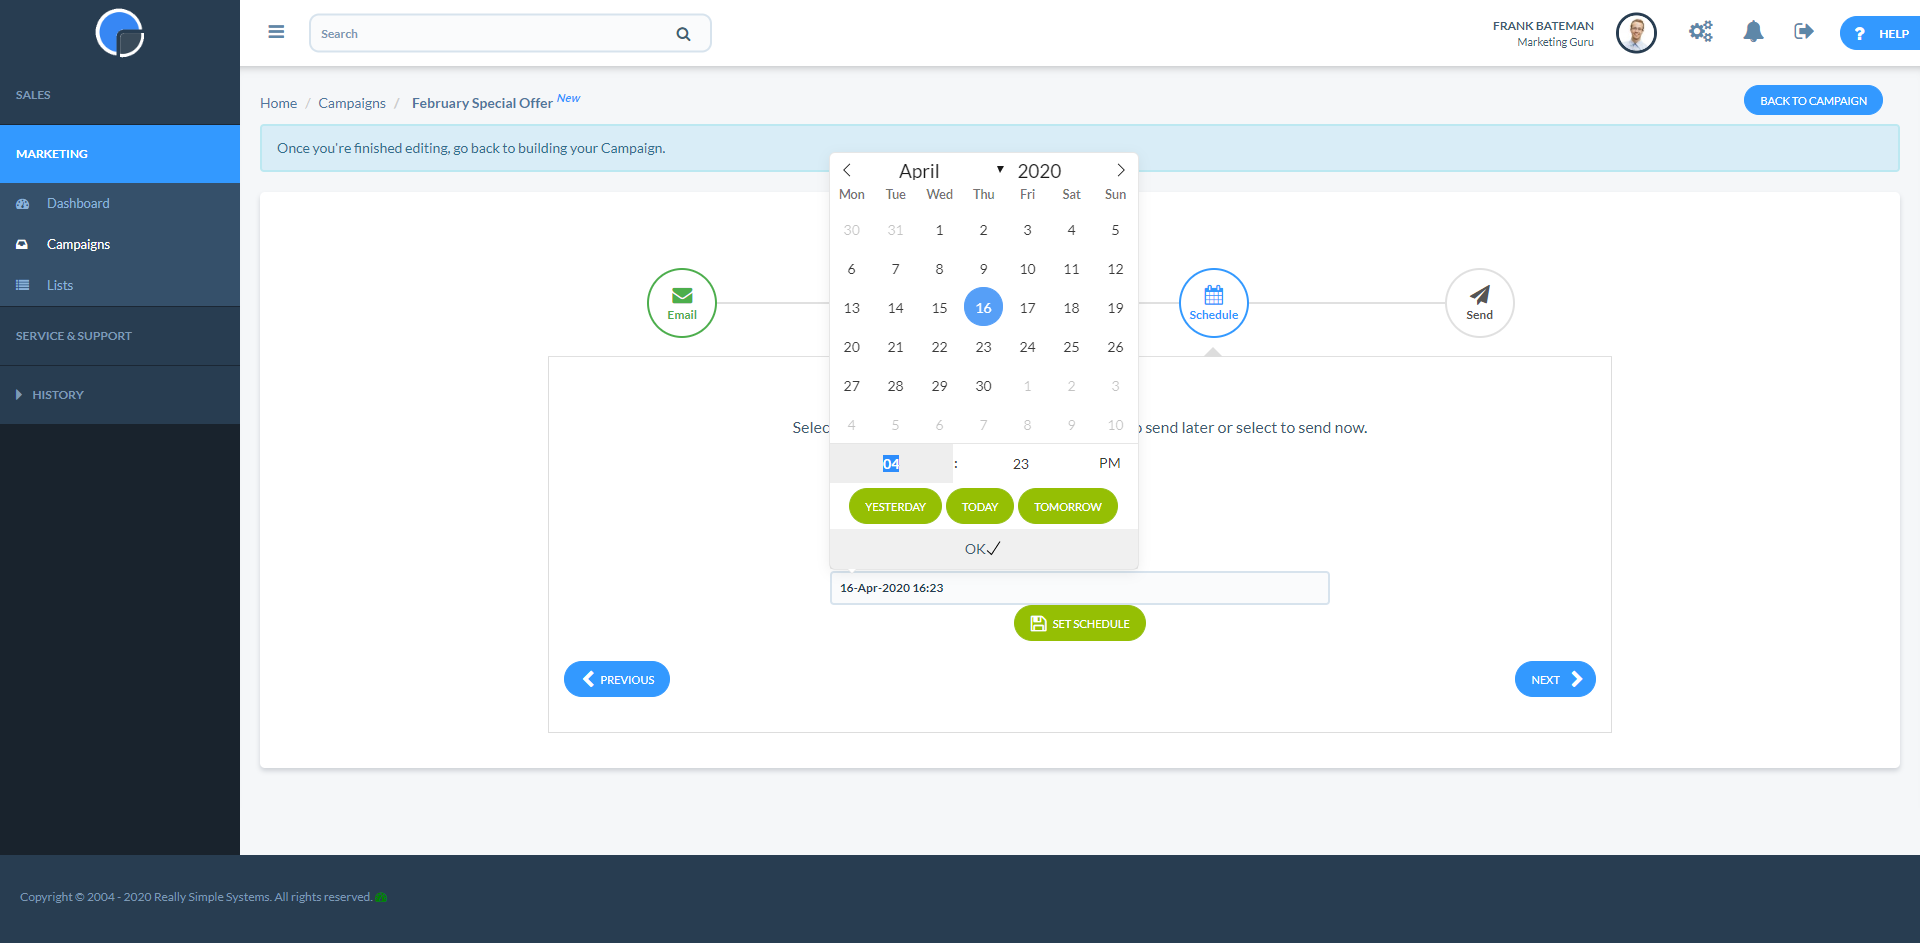
To schedule, click in the date box, and this will display a date picker. Select the date and time to send, then click Set Schedule.
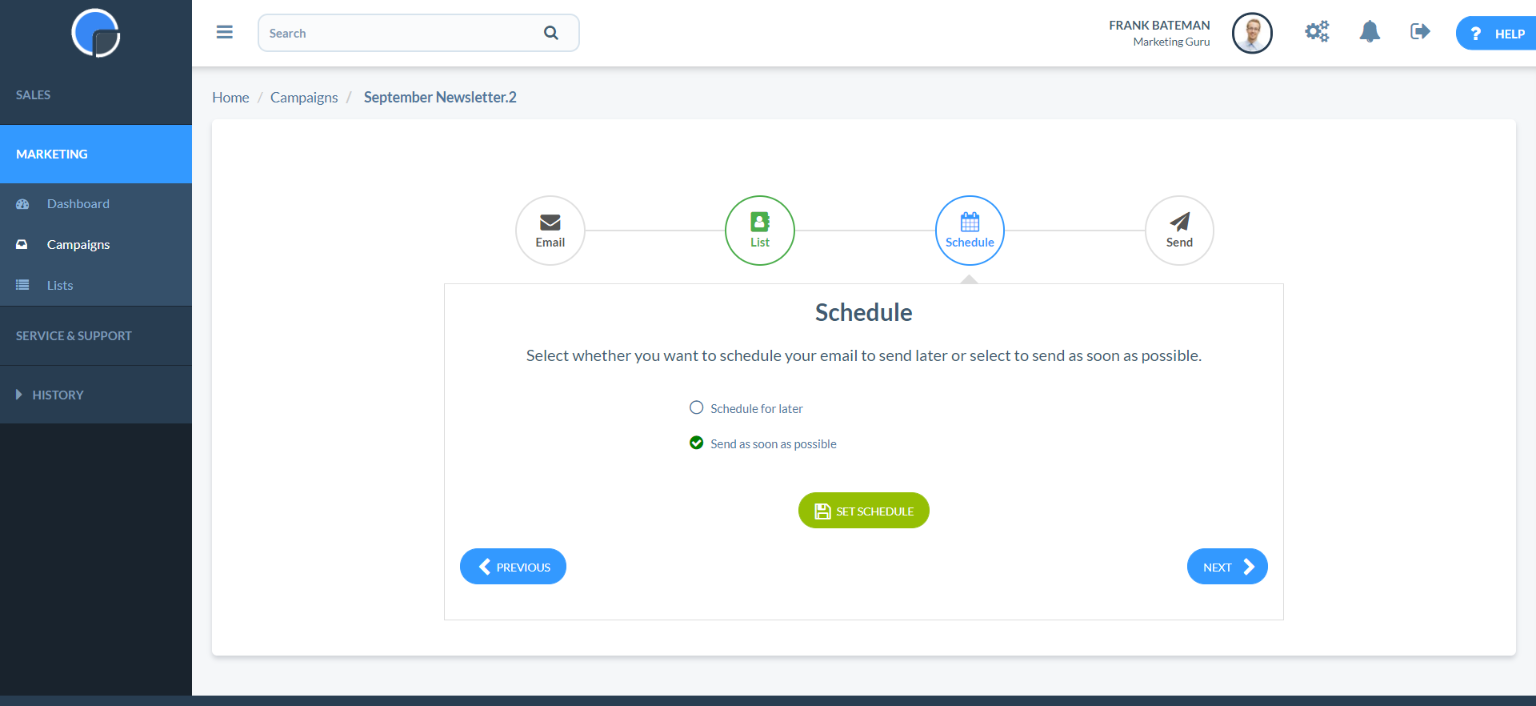
To send as soon as possible, select “Send as soon as possible,” then Set Schedule. The CRM system will queue your emails to be sent in a controlled manner, depending on the number of contacts selected and your reputation as a sender.
When you click Set Schedule, a summary of what you have set will be displayed. Then click Next.
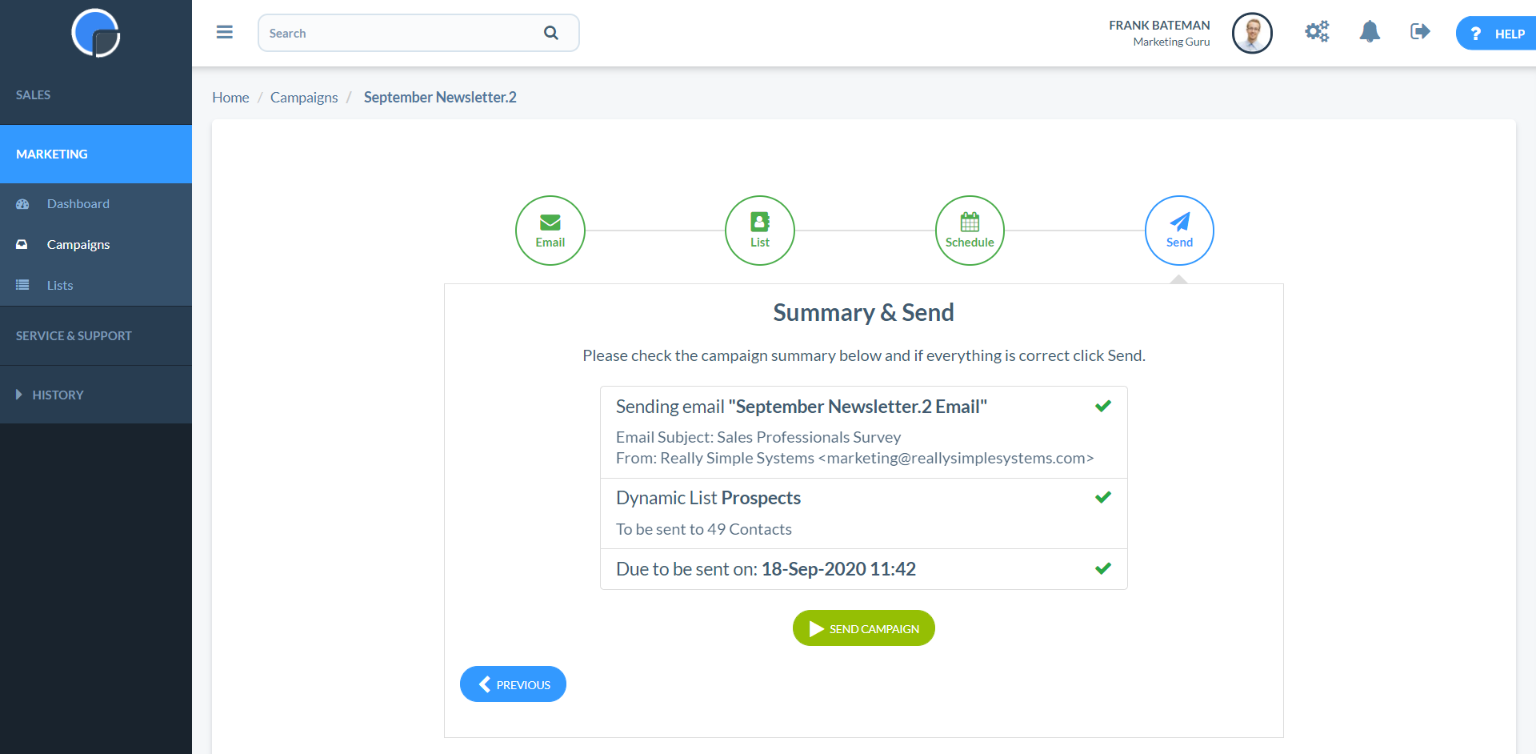
Send email
In the Send stage of the Campaign Wizard, you will see a summary of your campaign, showing your selected email design, the selected mailing list, and the scheduled date and time. Clicking Send Campaign will add your email to the mailer queue to be sent in a controlled process on the date and time you have selected.